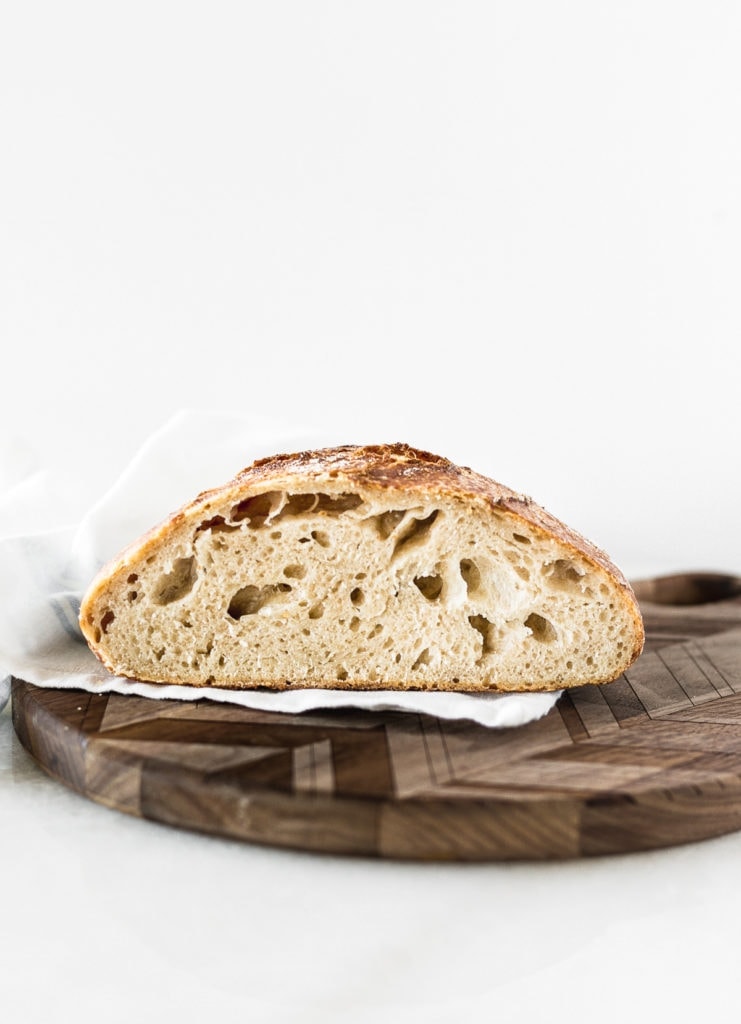
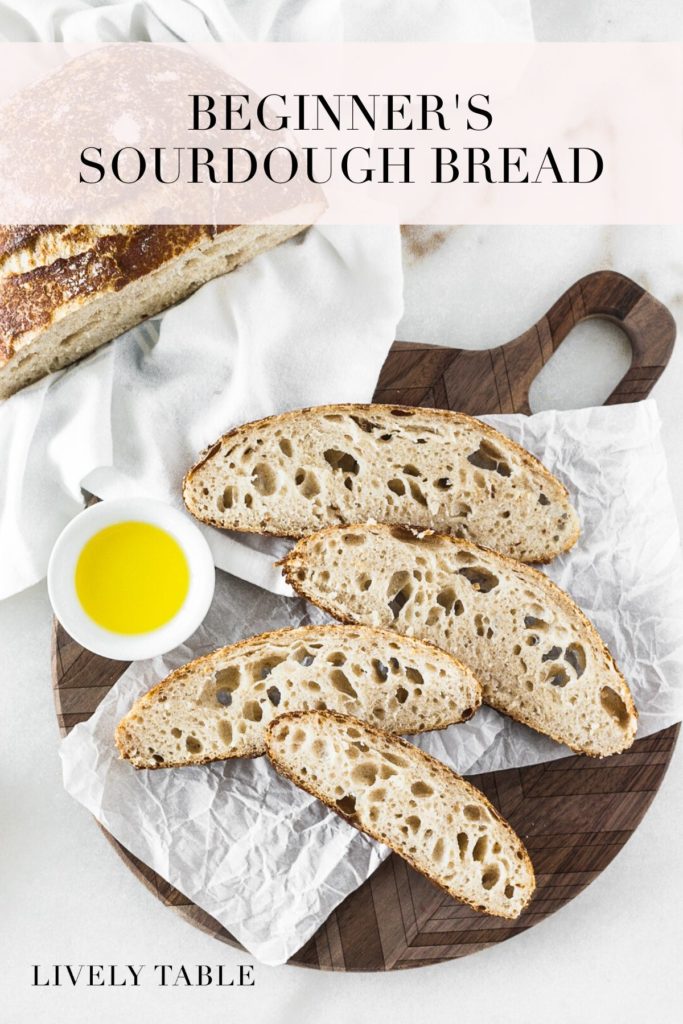
If you've always wanted to try making homemade sourdough bread with a starter, now's the time. In this beginner's guide, I'll show you how to make (relatively) easy basic sourdough bread - no yeast required - that will give you a beautiful, delicious loaf of freshly baked, crusty sourdough bread with big, beautiful holes.
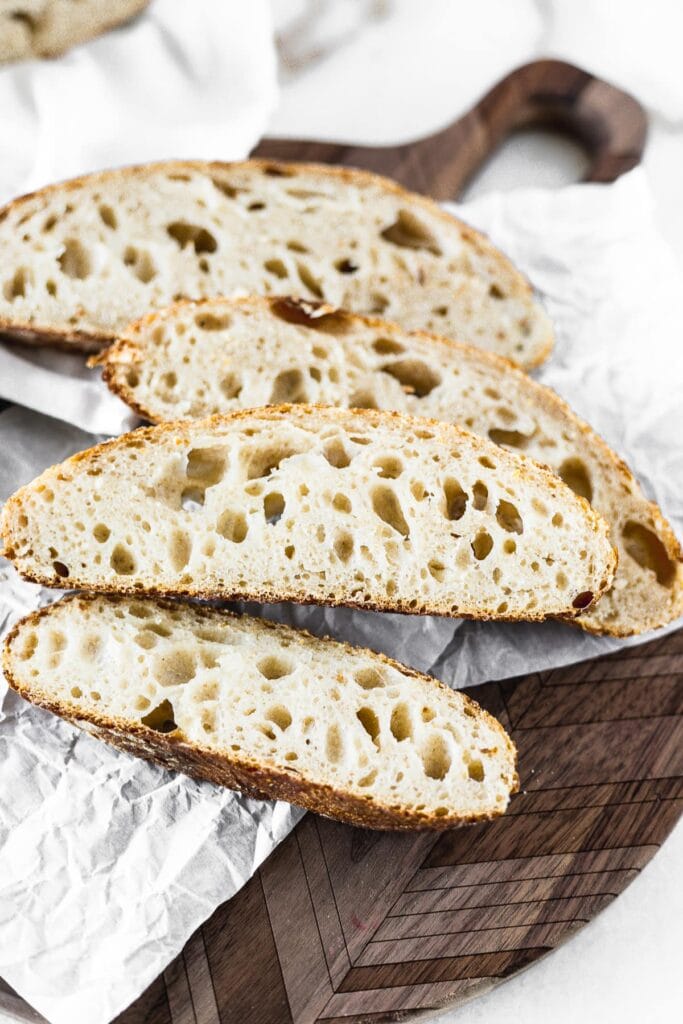
This post was originally published April 2016 and has been updated.
I've always imagined I'd be a great bread baker. I'd make homemade loaves weekly for my family, made from scratch with love while my kitchen was filled with the intoxicating scent of fresh-baked bread on a regular basis.
The reality is quite a bit different. Now that I have two young children, my bubbly little child made of flour and water tends to stand untouched in the refrigerator for weeks at a time. But once I pull him out of the fridge to bake with, he always springs back to life, ready for me to create a delicious loaf that humors the bread-making aspirations I once had.
It's been year since I first started making sourdough bread with a starter shipped to me all the way from Australia (Mick was his name). Mick traveled with us when we made our move to west Texas, then eventually died after months of neglect after I had my first (human) child. Funny how that happens. Anyway, here I am half a decade and two kids later, and I've only just now really figured out the sourdough method that works for me. I don't name my starters anymore, I've killed too many (mold, neglect, hot ovens). Best not to get attached. It's easier for me to make a new one than try to resurrect an old one sometimes.
With so many people now interested in baking sourdough, I thought it was time to update my tutorial. After all, there is nothing better than freshly baked bread, especially sourdough bread. My goal here is not to give you too precise of instructions. There are many other great sourdough bakers who can tell you the exact temperatures and conditions to yield the most beautiful loaf. However, in my experience, too much instruction has always confused me and overwhelmed me enough to deter me from even beginning. So this guide is a happy medium. Simple enough for beginners to get the idea, but also with enough information that you can make a successful loaf. And if you don't end up with a perfect loaf, try again. Making sourdough is an art that can only be learned through practice. And sometimes it takes years of practice to actually understand what's going on in the process. So without further ado:
The Beginner's Guide To Making Sourdough Bread From A Starter
Tools You'll Need
Besides basic kitchen essentials like a large bowl and spoon, there are a few things I recommend for making sourdough:
- A kitchen scale - while not absolutely necessary, measuring in weight is always much more accurate and will give you more consistent results. They're super cheap and handy in many applications.
- A glass jar or two for your starter - I like these Weck ones or these clamp lid ones.
- A proofing basket - you don't actually need a proofing basket, but if you plan to bake often, it's nice to have. That way you can season it once and be done instead of having to flour (and wash) towels each time you bake.
- Dutch oven - this is the best vessel for baking bread because of the lid and heavy weight. It's also something I recommend for everyday cooking.
- Bench scraper - this makes it easier to transfer your dough to the proofing basket once without deflating it.
- Cloth bowl cover and bread bag set - again, not something that's necessary but really nice to have if you plan on baking bread often. (I love this set from Food52.)
How To Make And Feed A Sourdough Starter
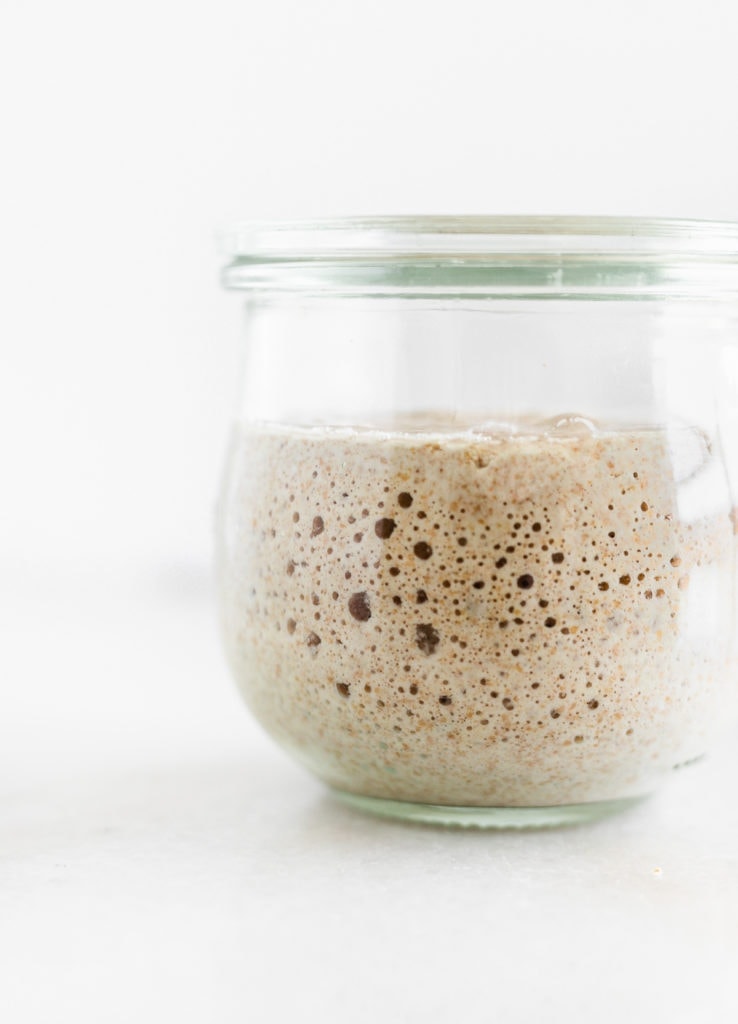
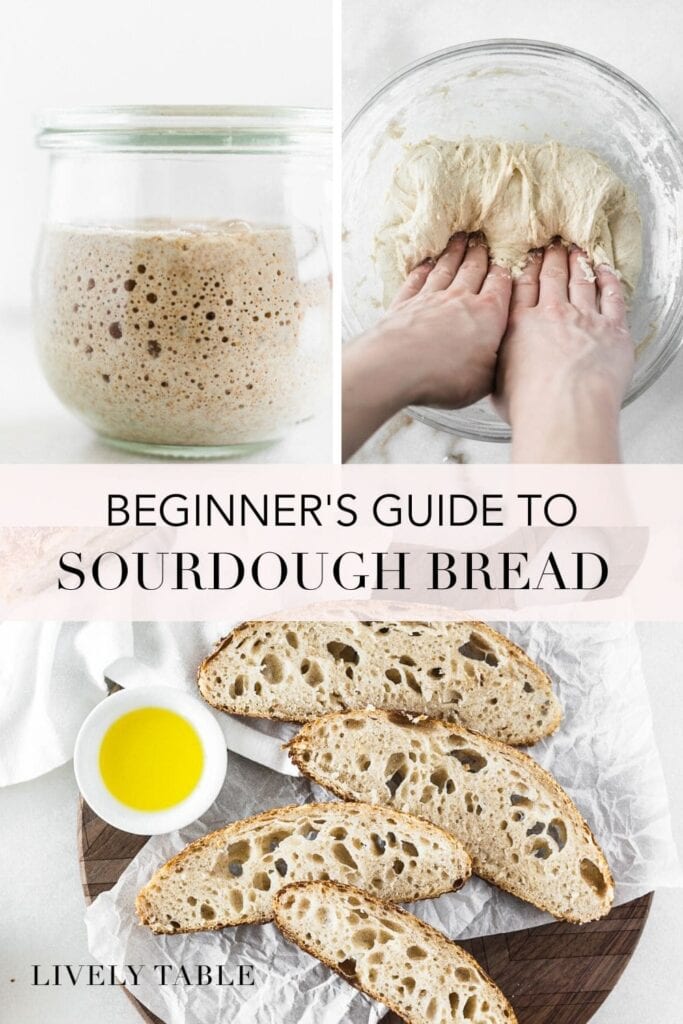
First things first, you need a starter to make sourdough bread. A starter is simply a mix of flour and water that ferments into a bubbly, culture-filled creature that will serve as the leavening for your bread. This way, you don't need yeast or other leavening agents. Making a sourdough starter is actually much easier than it sounds (it's the easiest part of making the bread for me).
To make a starter:
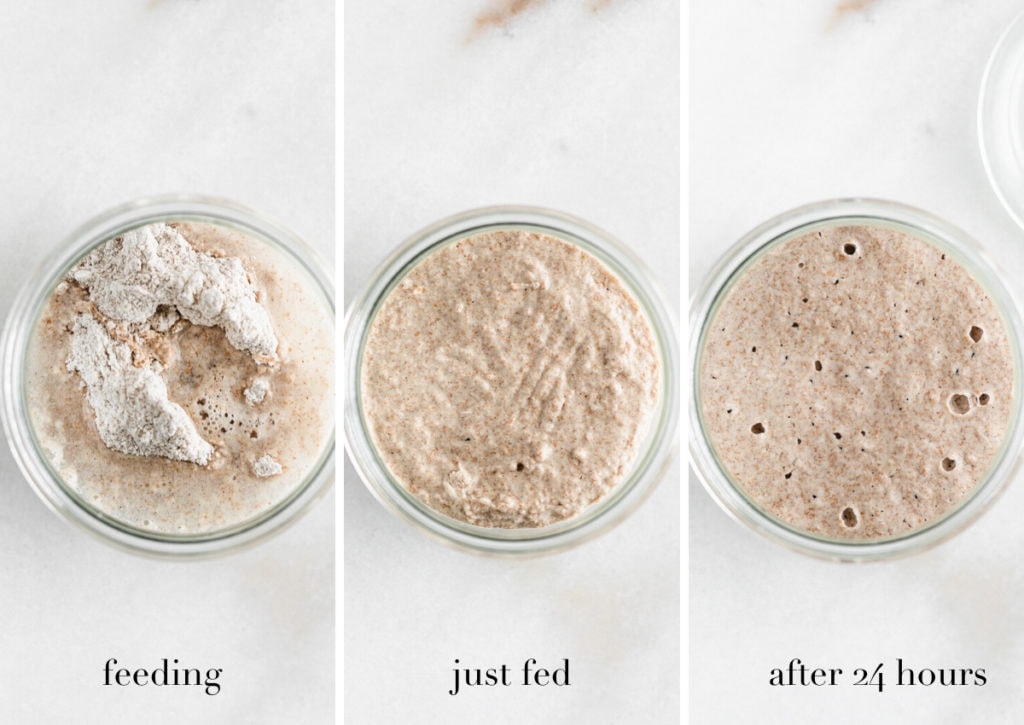
- Mix equal weights (I begin with 60 grams each) flour and water in a clean jar with a loose-fitting lid (such as a Weck jar or a clamp-lid jar, with the rubber gasket removed). (In cups, 60g is roughly ½ cup flour and ¼ cup water.)
- Let the mixture sit, covered, for up to 48 hours in a warm place (roughly 70 degrees), until you start to see little bubbles appear.
- Dump half of the mixture (but save it to make other yummy things with!), and feed your starter again by mixing in equal weights flour and water. So If you have 60g starter after you dump half, feed it 60g each of flour and water.
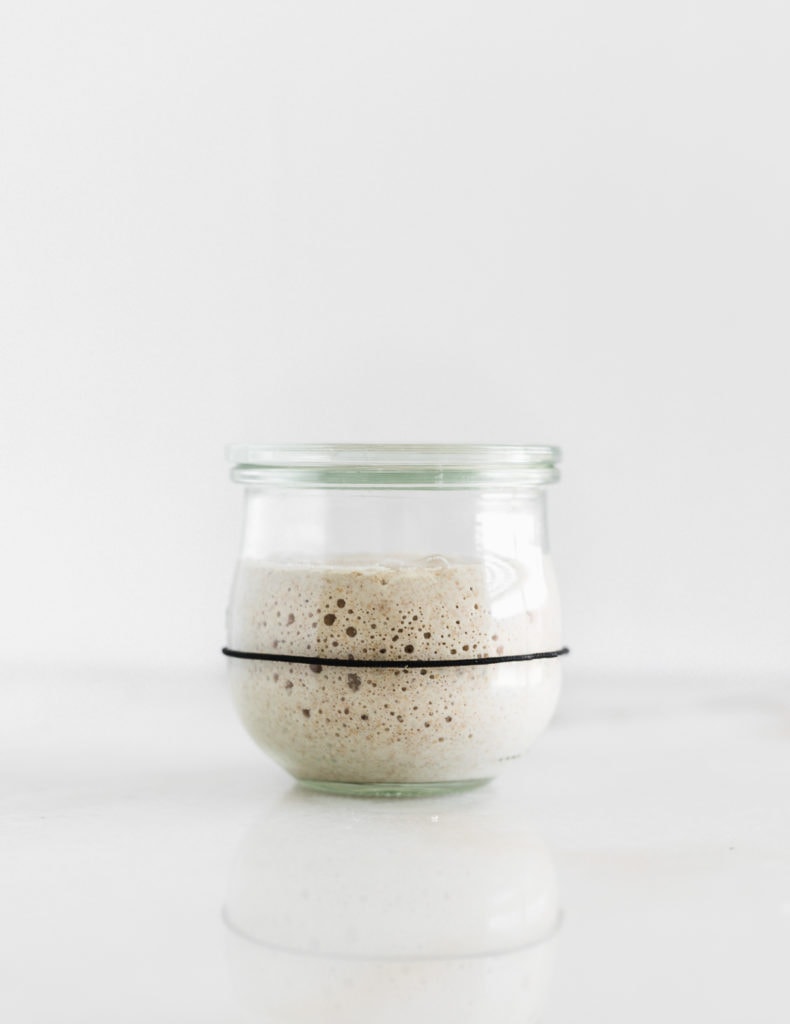
- Let the starter sit covered in a warm place again until you see it get bubbly, rise and fall. It can take anywhere from 12-24 hours, so I usually just feed mine once a day. You'll be able to see a line on your jar of where the starter rose to, to give you an idea of how active it is.
- Continue dumping half and feeding the starter every 12-24 hours until it is very bubbly and has doubled in volume. You can place a rubber band at the level line right after feeding to see how far it has risen. Once it's doubled in volume, it's ready to bake with.
Tips For Maintaining A Sourdough Starter
- I find that whole grain flour works best for a starter. I use white whole wheat or spelt flour.
- I've also found that overly-treated city water can hinder a starter, so I use distilled water at room temperature. If you don't have distilled water, use filtered water.
- You don't have to be super precise with the measurements, but you do want to keep it roughly equal weights for consistent results when baking.
- As the feeding process progresses, I like to use a smaller weight to save flour, usually 30 or 40g each. Once my starter is reliably active, I maintain it at about 50g, feeding 25 or 30g of flour and water each time.
- If you don't plan to bake very often, you can store your starter in the refrigerator, feeding it once a week or so. Take it out a day or two before you plan to bake so you can feed it and let it get active again. When I store it in the fridge I make sure it's sealed tightly (with the rubber gasket in the jar or with a screw-top lid) to prevent mold growth.
- If you see a liquid collect at the top of your starter, it means it's ready to be fed again.
- Starters need a warm temperature to thrive, so keep it in a warm place. If your kitchen is cold or drafty, try above the refrigerator or in the oven with the light on (although if you tend to forget things are in there, I don't recommend it, because you'll turn on the oven and cook the poor guy. I've done this too many times to keep storing it in the oven!). The cooler the temperature, the longer it will take for your starter to become active.
Basic Outline Of Sourdough Bread-Making Steps
Now that your starter is ready, it's time to make a loaf of bread! Baking sourdough typically follows a basic series of steps that are good to keep in mind. My method goes like this (and most are pretty similar):
- Mix the dough.
- Shape or knead the dough.
- Bulk rise, which is just letting the dough rest and ferment for a long period of time (8-10 hours).
- Shape the dough into a loaf.
- Second rise, which is shorter and done in a basket or vessel to help the loaf hold its shape.
- Score the dough (make a cut in it) and bake.
- Cool the bread.
How To Make Sourdough Bread With A Starter
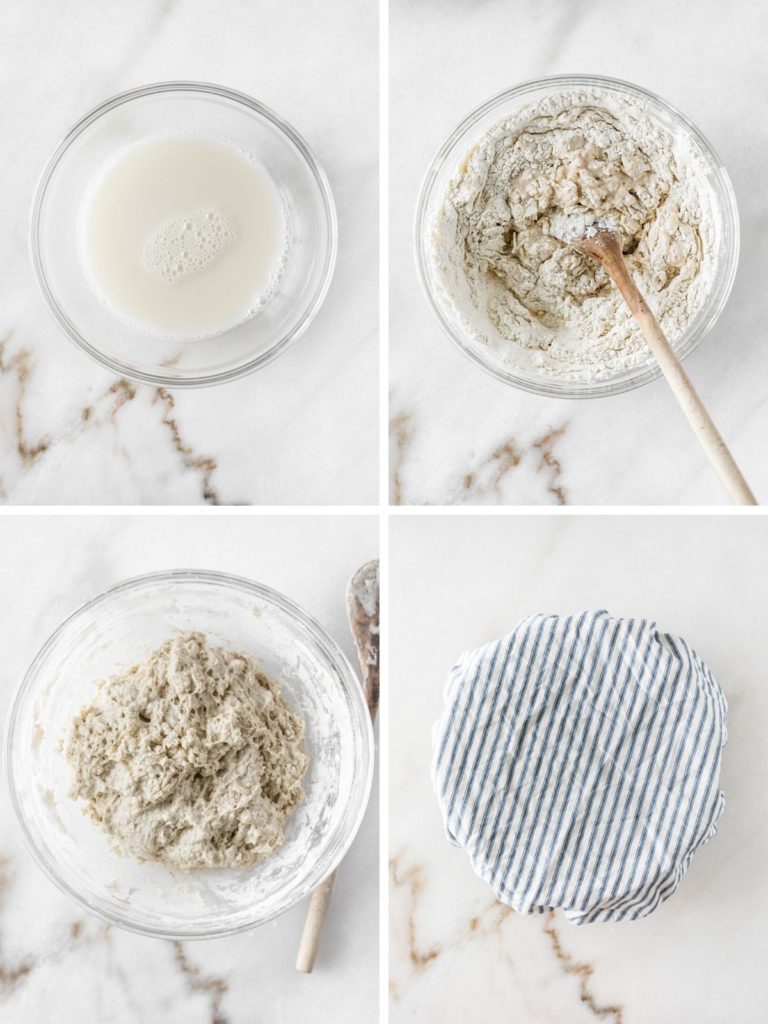
- Mix the dough. In a large bowl, mix active starter and distilled water until well combined. Stir in the flours and salt to form a shaggy dough. Let it rest 30 minutes, covered with a clean towel.
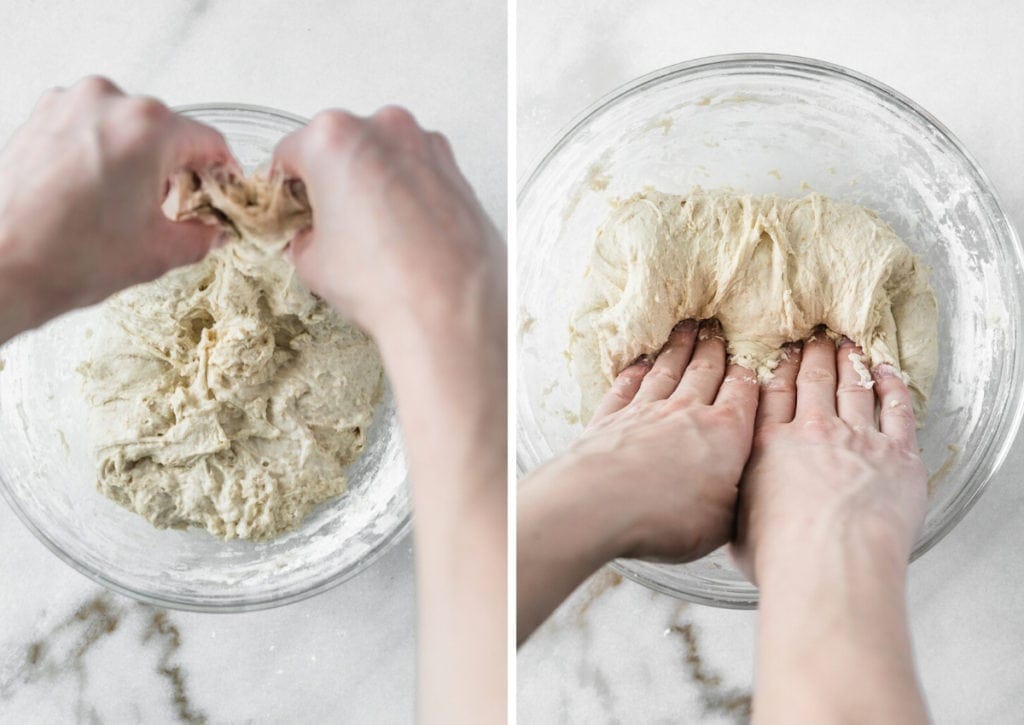
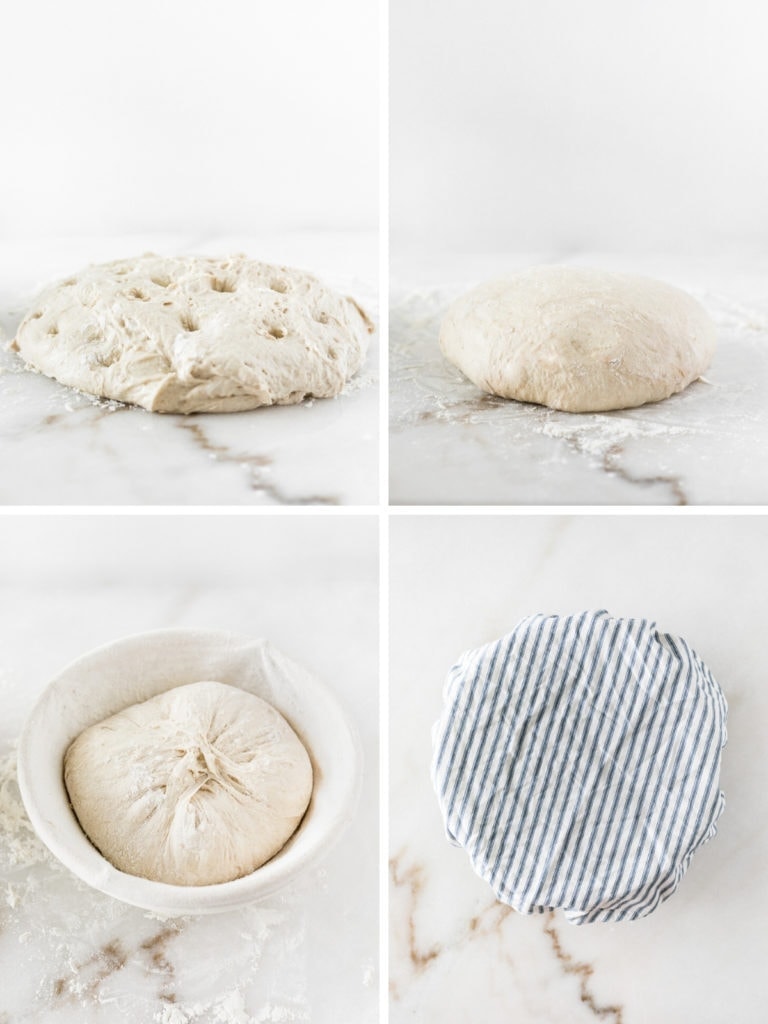
- Shape or gently knead the dough into a smooth ball by doing a series of 'stretch and folds': grab the dough at one edge and stretch it upward, then fold it into the center. Turn the bowl 90 degrees, then repeat until you have come full circle. Do this for about 15 seconds.
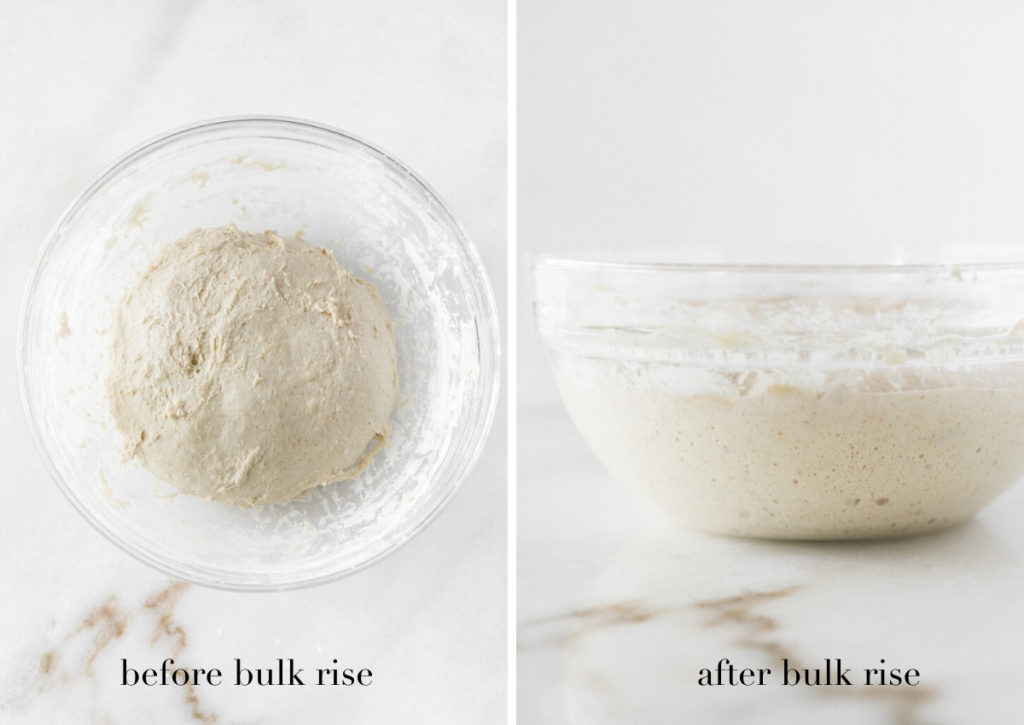
- Bulk rise. Let the dough rise for 8-10 hours at room temperature, covered. At the end of the bulk rise, the dough should be about doubled in volume, puffy, and jiggle slightly when you move the bowl.
- Optional step during bulk rise: you can do more 'stretch and folds' (one set of 4 folds each time) up to 4 times at the beginning of the bulk rise, starting 30 minutes into the bulk rise, spaced 30 minutes to an hour apart. I will usually do one or two in the first hour. But if you forget or don't want to, that's fine too.
- Optional step during bulk rise: you can do more 'stretch and folds' (one set of 4 folds each time) up to 4 times at the beginning of the bulk rise, starting 30 minutes into the bulk rise, spaced 30 minutes to an hour apart. I will usually do one or two in the first hour. But if you forget or don't want to, that's fine too.
- Shape the dough into a round. Gently turn the dough out of the bowl onto a lightly floured surface. With floured hands, use your fingers to gently dimple the dough. Then pull each edge toward the center to make a smooth ball. Turn it over, cup the dough with your hands and gently pull it toward yourself to tighten the shape. Transfer the dough to a floured proofing basket, seam side up. You can also use a bowl or colander lined with a floured tea towel.
- Second rise. Let the dough rise, covered, for an hour in the refrigerator. You can extend this rise time up to 6 hours if needed.
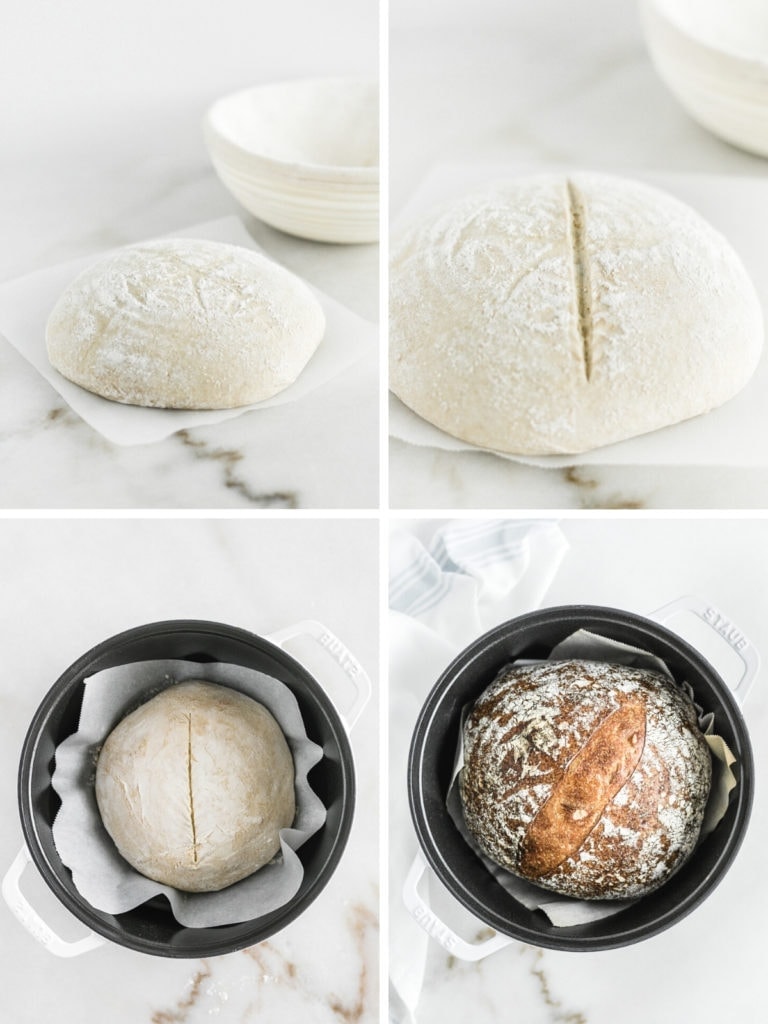
- Score and bake the dough. Preheat the oven to 450°F. Cut a piece of parchment to fit in the bottom of a Dutch oven. Invert the dough onto the parchment and transfer it to the Dutch oven. Use a sharp knife or razor blade to score the dough about ¼" deep. Bake with the lid on the Dutch oven for 20 minutes, then remove the lid and bake 30 minutes more. Finally, remove the bread from the Dutch oven and bake directly on the oven rack for 10 minutes to crisp the crust (optional - I usually keep it in the Dutch oven for the last 10 minutes.)
- Remove the bread from the oven and cool for at least an hour before cutting.
About This Basic Sourdough Bread Recipe
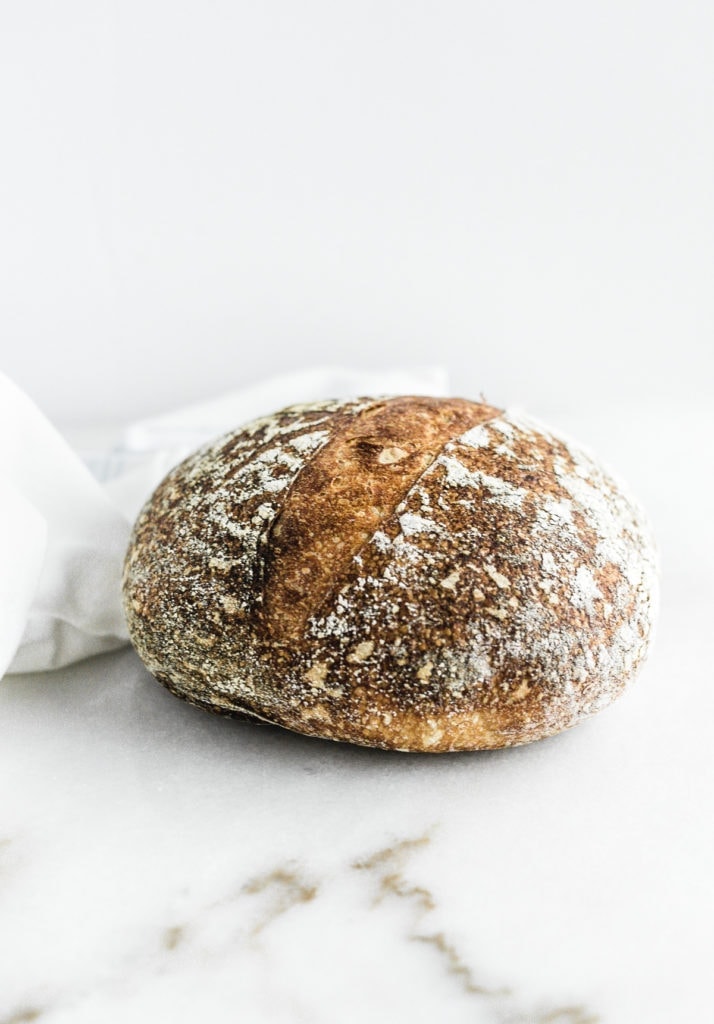
For this basic sourdough bread, I use a little bit higher hydration recipe - that is, a little more water - because I find that's what works best for my dry climate. It also yields a more airy loaf with those big, beautiful holes. The high protein content of bread flour is essential for a strong loaf that rises well and hold it's shape. I recommend using at least 350g of bread flour, using up to 150g whole wheat or other whole grain (or all purpose) flour if you'd like.
Storing Sourdough Bread
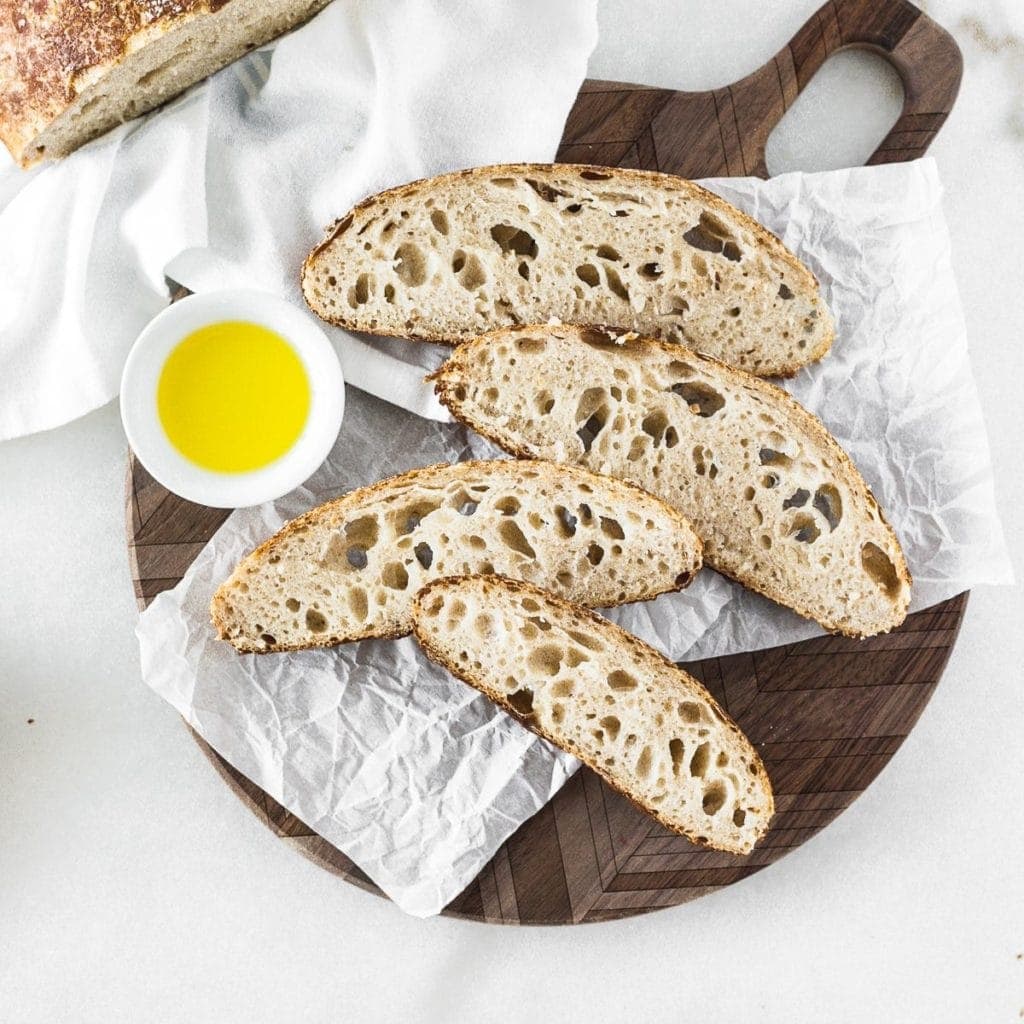
Sourdough bread is best eaten the day it is baked, but as a family of 2 (and a half), we rarely eat more than a couple of pieces the first day. I like storing my bread on the counter in a bread bag (I like this cloth one). It can also be kept in the refrigerator or freezer in a zipper bag.
A Final Note About Making Sourdough Bread
I know there are so many recipes for sourdough bread on the internet, and I am by no means an expert sourdough baker. My goal here is to make sourdough approachable for you to try at home, which is why I didn't include a lot of technical terms, specialty flours, or specific temperatures. It will take a little bit of practice for you to get a feel for the process of making sourdough, and you will have to figure out what works the best for you and the specific conditions of your kitchen, schedule, ingredients, etc. But this recipe is a good, simple starting point for you to go off of. If you have any questions, feel free to drop them in the comments!
Did you make this recipe? Please leave a star rating in the comments!
PrintHomemade Sourdough Bread From a Starter
If you've always wanted to try making homemade sourdough bread with a starter, now's the time. In this beginner's guide, I'll show you how to make (relatively) easy basic sourdough bread - no yeast required - that will give you a beautiful, delicious loaf of freshly baked, crusty sourdough bread with big, beautiful holes.
- Prep Time: 30 minutes
- Cook Time: 60 minutes
- Total Time: 12 hours
- Yield: 1 loaf 1x
- Category: bread
- Method: sourdough
- Cuisine: American
Ingredients
- 60g (¼ cup) active sourdough starter
- 375 g (1 ½ cups + 2 tbsp) distilled water (or filtered water)
- 350 g (scant 3 cups) bread flour
- 150 g (1 ⅓ cup) whole wheat flour (or all purpose, or more bread flour)
- 9 g (1 ½ tsp) salt
Instructions
- Mix the dough. In a large bowl, mix together starter and water with a fork. Stir in flours and salt to to form a shaggy dough. Cover with a clean towel (or cloth bowl cover) and let rest 30 minutes.
- Gently knead the dough into a smooth ball by doing a series of 'stretch and folds' - stretch one edge of the dough and fold it into the center. Turn the bowl 90 degrees and repeat until you have come full circle. This is one set. Continue for about 15 seconds.
- Bulk rise. Cover the bowl and let it rise at room temperature for 8-10 hours, or until puffy and doubled in volume. (Optional - do up to 4 more sets of 'stretch and fold' every 30 minutes in the beginning of the bulk rise.)
- Shape the dough into a round. Gently turn the dough out of the bowl onto a lightly floured surface. Use floured fingers to dimple the dough. Then shape into a round by pulling the edges toward the center (similar to the stretch and fold technique) to make a smooth ball. Turn the dough over so the seam side is down, cup the dough with your hands, and gently pull it toward yourself to tighten the shape. Use a bench scraper (or your hands) to transfer to a proofing basket dusted with flour, seam side up. You can also use a clean bowl or colander lined with a clean towel that has been dusted with flour.
- Let the dough rise 60 minutes in the refrigerator. You can extend this rise time up to 6 hours if needed.
- Heat the oven to 450°F. Cut a piece of parchment paper to fit the bottom of your Dutch oven. Gently invert the dough onto the parchment. Use a sharp knife or razor blade to score the dough about ¼" deep. Place dough in the Dutch oven. Place the lid on.
- Bake covered for 20 minutes, then remove the lid and bake an additional 40 minutes. You may place the bread directly on oven rack for the last 10 minutes for a more crispy crust, or just leave it in the Dutch oven.
- Remove the bread from the oven and let it cool on a cooling rack for at least 1 hour before cutting.
Notes
- After you use the starter, feed it again with equal weights flour and water, and store in the refrigerator, or on the counter if you will bake again in the next day or two.
- Rise times may vary based on your room's temperature. The cultures in sourdough like warm temperatures, so place the dough at room temperature or slightly above (roughly 70-75°F) to rise.
- Volume measurements are a rough estimate. I recommend using a kitchen scale and using weights. If you are using measuring cups, make sure to spoon the flour into the cups then level off with a knife to get the best measurement.
- You can use bread flour for all of the flour in this recipe, or use up to 150 g whole wheat or all purpose flour. Using all bread flour will give you a bit heavier bread.
- This dough is a little higher hydration (more water), which gives it the nice holes, though it is a little more sticky to work with. Flour your hands well when working with the dough.
- Sourdough bread is best eaten the day it is made. However, I know we can never eat that much bread in a day in our family! I suggest storing it in a bread bag (like this one) on the counter for up to 2 days, or in a zipper bag in the refrigerator or freezer beyond that.
Keywords: homemade sourdough bread, basic sourdough bread, sourdough bread from starter


Deb says
Question for you! If Im baking in an iron pan, should I take it out of the pan and place it on the cooling rack when I take it out of the oven? Or leave it in the pan for cooling. Seems like a silly question but it says this is part of the baking process.
Thanks,
deb
Heike says
So delicious! I baked mine on a pizza stone and it turned dark fairly quick, so I turned down the temp. (I actually think it is my oven that is a bit out of whack with the temperatures.) I will make this bread again for sure!
★★★★★
Kaleigh says
I'm so glad it turned out well for you, Heike!
Mel says
This recipe made a beautiful loaf of sourdough with a beautiful crumb and great oven rise.
The stretching method is by far the best I’ve ever used.
However...The first time I baked it at 475F for 30 minutes in a covered cloche, with parchment paper, then uncovered for 15 minutes...the bottom crust BURNED badly.
The last time I baked it I reduced the cook time to 35 minutes and the bottom crust was still burned slightly,
so I guess I’m making progress.
Since this recipe produces a terrific loaf of bread I’m not giving up.
Next time I’ll try lowering the oven temp to 450F.
Jen says
Mick is quite handsome. Jean-Luc is now (hopefully) coming to life in my kitchen, thanks to you. lol Thanks for always posting such great recipes and ideas!
Kaleigh says
Awesome! Hope he brings you lots of yummy things!
Janette Eisenegger says
This is a really interesting site, thank you. As I;ve never made a starter etc.I don't make bread every week, can the extra be put in the freezer? Izzy
Kaleigh says
Hi Janette, you can keep you starter in the refrigerator, feeding it once a week. I haven't tried keeping it the freezer before, so I can't say if it works.
taramdeal says
My husband and I just recently made our own sourdough starter, but it was important for me to use 100% whole wheat flour so we used Bob's Red Mill Organic Whole Wheat pastry flour so the bran particles were smaller/finer. Overall, it tasted and turned out wonderful! We now have our starter in the fridge to rest as well 🙂 One thing that I read over and over was that weighing the ingredients was super important because of the different weights of different types of flours. What was your experience with this?
Kaleigh M says
Thanks for stopping by, Tara! I want to experiment with making my own starter. I've heard to use 100% whole wheat flour for this as well. I don't weigh my ingredients for the simple fact that I don't have a kitchen scale (I know horrible!) but my bread has always turned out fine!
Meal Makeover Mom Janice says
I've thought about making my own sourdough bread in the past but have never done it. Maybe now with your inspiration I'll give it a try!
Kaleigh M says
I hope you do, Janice! It's so rewarding!
Steph | The Grateful Grazer says
Such a beautiful bread! I need to find a guy like Mick for my own kitchen! 😉
Kaleigh M says
Thanks, Steph! You sure do! 🙂